• Home

  • Productivity

  • Productivity tips

Productivity tips

21 min read

Solve Problems and Test Ideas Faster with Google Ventures' Design Sprint Framework

By Eric Carter · April 28, 2016
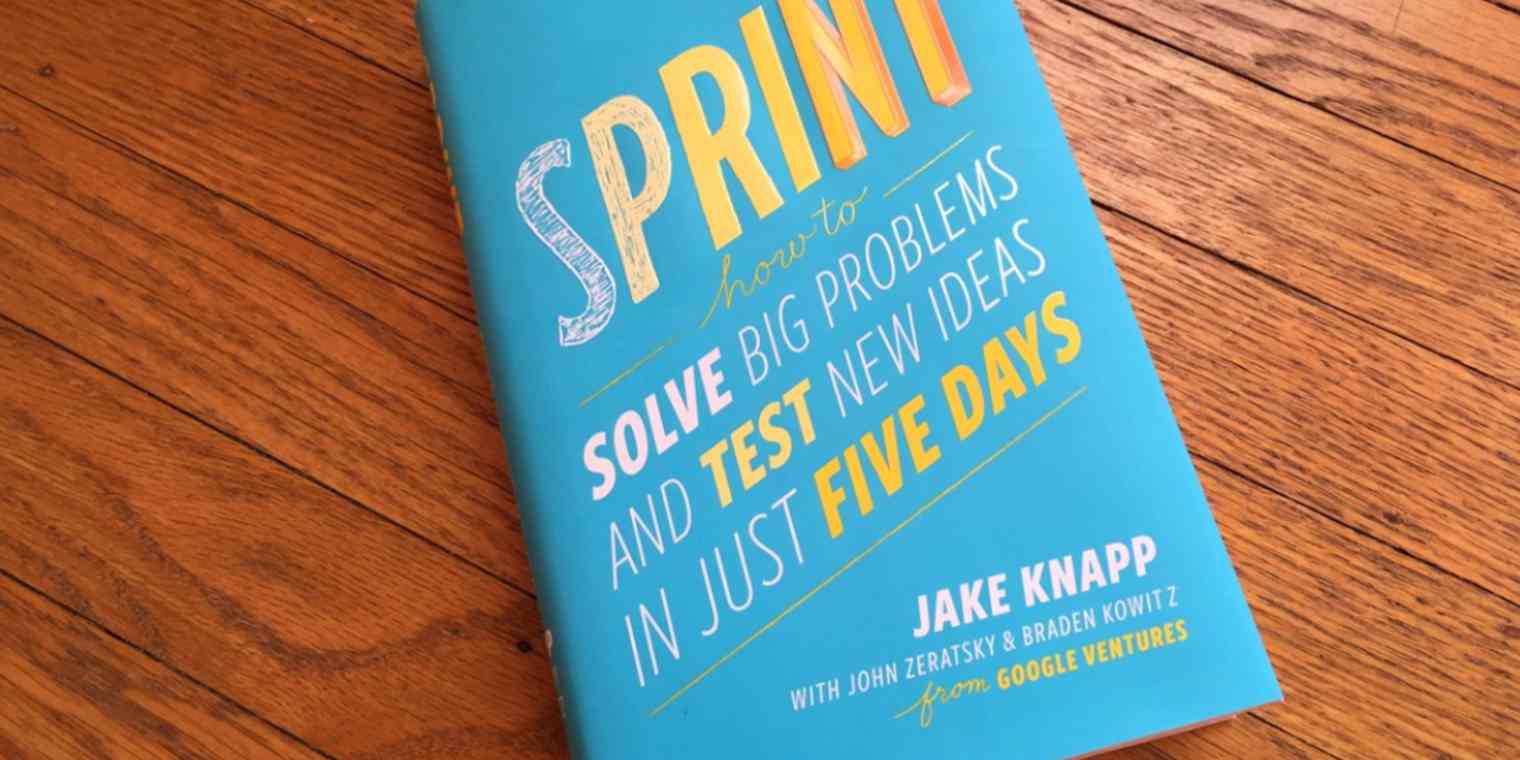
google-ventures-design-sprint primary img

The best ideas always seem to come at the last minute. There's a project with a crazy deadline, a blank spot in this week's editorial calendar, or an impromptu speech an hour from now. Somehow, you rise to the occasion and pull something together—something that's accidentally brilliant.

Constraints work. They force us to try something without overthinking it.

Brainstorming sessions, on the other hand, are purposely set up without restraints. You'll feel creative and come away with tons of ideas—but how many actually turn into something real?

Not many. At least, not at Alphabet, Inc.'s investment arm, GV (formerly Google Ventures). Design partner Jake Knapp and the rest of the GV team noticed that brainstormed ideas were far less likely to stick than those generated by individuals during their normal work. Crazily enough, the best ideas seem to come from the tightest constraints.

That insight prompted them to recreate the rushed conditions, and make a new form of brainstorm called a Design Sprint—the focus of their new book, Sprint. These sprints helped Google improve Chrome, Gmail, and Google Search, enough that the idea has already spread to Medium, Blue Bottle Coffee and other companies in their portfolio.

It's a tried-and-tested method that just might be what your next big thing needs.


The GV Design Sprint Week:

  • Day 1: Understand

  • Day 2: Sketch

  • Day 3: Storyboard

  • Day 4: Prototype

  • Day 5: Test


The GV Design Sprint

GV Design Sprint Workflow

Setting arduous due dates on every project will only lead to burnout. So how do you hit the sweet spot, where your team has enough time to come up with ideas and implement them, but not enough time to overthink those concepts?

Knapp and the GV team settled on a five-day, five-step process for design sprints. That structure gives them enough time to answer critical questions, with a dedicated day for each of the following: understanding, sketching, storyboarding, prototyping, and testing. You'll come up with an idea, make something, try it, and see if it works. If so, win; if not, it only took a week.

Maybe a week is more time than your team can afford for a design sprint. That's fine: The underlying process from a full design sprint can still solve smaller challenges in shorter timeframes.

Let's walk through what each step of GV's five-day process, and adapt it to quickly solving problems with fewer resources. We'll make our own "mini-design sprint" with adjustments to each day's schedule, and see how it could help us with a common problem:

Our company wants to engage blog readers through a call to action (CTA) with additional products from our company. The CTA may come in the form of a survey, form, or an alternative solution. Success equals reader action beyond simply reading the blog post.

Let's dive in.

Day 1: Understand

GV Design Sprint Day 1

To build a solution, you need to understand the problem. That's why day 1 of the GV design sprint focuses on understanding the issue, not brainstorming fixes. You'll create a path to follow throughout the week with this five-step process:

  1. Start at the End

  2. Map

  3. Interview the Experts

  4. How Might We?

  5. Target


1. Start at the End

Starting at the end gives you "...a look ahead—to the end of the sprint week and beyond," says Knapp in the Sprint book. "Staring at the end is like being handed the keys to a time machine. If you could jump ahead to the end of your sprint, what questions would be answered?"

To set your sights on the future, you'll need to do two things: set a long-term goal, and list the questions that you want your sprint to answer.

Your long-term goal should be ambitious, and potentially overreaching—it's your moonshot. For our problem, the long-term goal could be to engage every blog reader with an additional product from our company.

Then, write questions for your sprint that balance optimism with questions that uncover assumptions and roadblocks. Potential sprint questions for our problem include What actions could the company take that would turn a reader away? and What might cause someone to stop reading?

2. Map

Once the end goal and the sprint questions are identified, create a basic map for the project. List the actors—those affected by the sprint—on the left side, and the end goal on the right side of the map. In the middle, add boxes, text, and arrows that take the key parties to the desired end goal in around 5 to 15 steps.

For our problem, the blog reader and our company are the key actors, and the end goal is further engagement with the website. For a medical solution, a map like the one below might work:

GV Design Sprint Map

3. Interview the Experts

Now it's time to get context from experts. Introduce the sprint, share the map, and invite them to share everything they know about the challenge. Ask as many questions as possible, and write everything down.

Who should you interview? You could call professors and industry insiders—but I bet you already have experts on your team. For our sample project, experts include co-workers, stakeholders, and blog readers.

4. How Might We?

To make sure you gather actionable info during expert interviews—and to test the ideas in the map—GV uses the a How Might We method (or HMW for short). This method puts notes in the form of questions to spark creativity.

Write individual HMW questions on sticky notes, always starting with the words How might we. Sticky notes might seem awfully low-tech, but GV found that that they let you leverage spatial learning. You can quickly arrange sticky notes in groups, or simply throw away ideas that don’t seem to fit.

Our example problem, restated in the HMW format, reads: How might we increase blog reader engagement with additional products from our company? Additional HMW questions complement the challenge:

  1. How might we keep readers reading?

  2. How might we increase click through rates of supplemental content?

  3. How might we entice readers to further engage beyond consuming content?

  4. How might we prevent readers from leaving the blog?

Questions like this—listed on their own, individual sticky note—tend to spark creative solutions. As the GV team found:

"When we tried [HMW], we came to appreciate how the open-ended, optimistic phrasing forced us to look for opportunities and challenges, rather than getting bogged down by problems or, almost worse, jumping to solutions too soon. And because every question shares the same format, it's possible to read, understand, and evaluate a whole wall full of these notes at once."

5. Target

The final step of day one is to identify the target. GV states:

"Your final task on Monday is to choose a target for your sprint. Who is the most important customer, and what's the critical moment of that customer's experience? The rest of the sprint will flow from this decision."

The most important customer in our problem is the blog reader. The critical moment is when that reader decides to further engage with additional options, or leave the blog.

Day 1 Adjustments

If you could jump ahead to the end of your sprint, what questions would be answered?

To achieve all five steps during day 1 of a mini-sprint—or even a full-length sprint—lean on your time constraints. Otherwise, you'll spend all day on one point. That's why GV encourages limitations during day 1. In a Fast Company article, Knapp says:

"One day I noticed something about my own design projects. The best work happened in short bursts, when I was under a deadline....But I also didn’t have too much time. I couldn’t afford to overthink things or get caught up in urgent but less important issues, the way I often did on normal workdays."

Try dedicating 10 minutes of each work hour to the design sprint. Then, work on your normal tasks for the remainder of the hour. A kitchen timer might be your best co-sprinter.

Additionally, the full design sprint requires a sizable, dedicated space for the entire week (e.g. white boards to cover in maps, sticky notes, goals, sprint questions, etc.). You might not have that much space to spare. Instead, you could use a kanban board app such as Trello or LeanKit to mimic the sticky notes on a board.

The goal of a mini-design sprint is to get the benefits of a full sprint without its full requirements. So be creative—you'll find a happy medium that fits your time and space limits.

Day 2: Sketch

GV Design Sprint Day 2

Now it's time to find a solution to address the target you found at the end of day 1. To find a solution, GV suggests a two-step process:

  1. Remix and Improve

  2. Sketch


1. Remix and Improve

Grab your research from day 1, and pair it with third-party content to drive towards a solution by the end of the day. GV encourages to:

"...search for existing ideas you can use in the afternoon to inform your solution. It's like playing with Lego bricks: first gather useful components, then convert them into something original and new."

In addition to gathering the helpful notes, maps, and ideas from day 1, look within your company for prior attempts to address the issue, and see what other companies have done with similar problems. Looking within the company is straightforward: Simply ask your team Has anyone addressed this before?. Often, great ideas have been pitched in the past—they just never were acted upon.

For our CTA project, consider other industries known for strong call to actions. For example, daily deal sites, car dealerships, and infomercials are all known for effective—and over-the-top—calls to action. While a neon HUGE SALE! sign isn't the right solution, certain tactics from flashier companies might translate well. For example, car dealerships lean on action verbs, and give you the fear of missing out with a limited time to act.

Note the big ideas, things that could trigger action when sketching out a solution later in the day. GV suggests reviewing up to twenty solutions, then adjust your goal or map if it seems they're worth exploring.

2. Sketch

Next, it's time to sketch. Grab paper and pencils, and draw ideas that could turn into a solution. You don't have to be an artist; GV assures you that:

"Everyone can write words, draw boxes, and express his or her ideas with the same clarity. If you can't draw (or rather, if you think you can't draw), don't freak out. Plenty of people worry about putting pen to paper, but anybody-absolutely anybody-can sketch a great solution."

The point of the sketch has nothing to do with a pretty picture. Rather, sketching is "the fastest and easiest way to transform abstract ideas into concrete solutions." GV suggests these four steps for creating your sketch:

  1. Notes

  2. Ideas

  3. Crazy 8's

  4. Solution Sketch

The Notes of a sketch are the "greatest hits" of everything captured up to this point. The best content from the long term goal, target, questions, maps, third-party solutions, and everything else should be written down for a twenty minute period. Within the "greatest hits" list, circle ideas that stand out.

Then, start drawing in the Ideas section of the sketch. Take another twenty minutes to transform the notes into diagrams, doodles, headlines, or anything that gives structure to the notes. Don't worry about it looking perfect; just draw whatever comes to mind.

GV Design Sprint sticky notes

With some structured ideas in place, start a game of Crazy 8's. Here, you'll sketch eight different solutions to the problem in eight minutes. With only one minute per solution, there's no time to come up with completely different solutions. Rather, each one is generally the strongest solution, along with a small change that could improve it. For our project, one solution might be a CTA form to fill out at the end of blog posts, while another might be the same form in the middle of posts.

With a foundation of notes, ideas, and eight rough solutions, day 2 ends with a Solution Sketch—the "best idea, put down on paper in detail" as GV describes it. The solution sketch should be drawn in a three-panel storyboard, because:

"...products and services are more like movies than snapshots. Customers don't just appear in one freeze frame and then disappear in the next. Instead, they move through your solution like actors in a scene. Your solution has to move right along with them."

In our project, the first frame should introduce the reader to the idea that they will be invited to engage with another product from our company. The second frame should demonstrate the moment when the reader is presented with the option to further engage. The third frame should follow the reader through the desired engagement.

The solution sketch should be self-explanatory. "If no one can understand [the solution] in sketch form, it's not likely to do any better when it's polished," says the GV team. It doesn't need to be beautiful, per se, but words especially matter. Instead of using placeholders like "lorem ipsum" or "text will go here", take a little extra time to draft the intended text. Clear, concise, strategic choice of words is key to any solution, and can make or break a user experience.

Day 2 Adjustments

Anybody-absolutely anybody-can sketch a great solution.

Similar to day 1, day 2 requires some adjustments for our mini-sprint. For instance, when reviewing third party solutions, GV utilizes lightning demos, three minute tours of attractive third party solutions. During a mini-design sprint, perhaps set a time limit of ten to twenty minutes to review third party solutions, then review the selected solutions for a maximum of three minutes each.

Additionally, day two of a GV design sprint requires some voting to narrow the field of sketches and solutions. In the mini-design sprint, there's likely a single sketcher: you. To help yourself pick the best idea, leave the solution sketches alone for a bit, and eliminate the solution sketches that don't measure up. It's easier to see what's best when you've stepped away.

Day 3: Storyboard

GV Design Sprint Day 3

The goal of day 3 is to create a detailed storyboard: a step-by-step plan that guides the prototype. First, GV suggests narrowing the list of solution sketches from day 2, if you haven't already. To do that, they have a five-step process:

  1. Art Museum: Line your sketches up in a single row and look at them all at once. Give each sketch equal weight from a visual perspective.

  2. Heat Map: Place dot stickers next to particularly interesting aspects—good ideas will start to stand out as clusters of stickers.

  3. Speed Critique: Spend three minutes with each solution and record promising ideas, with a focus on clusters of dots from the heat map.

  4. Straw Poll: For 10 minutes, vote for solutions with dot stickers. Make sure you can illustrate why you voted for a particular solution.

  5. Supervote: The "decider" gets three votes; they can use all three votes for a single solution, or distribute the votes to multiple solutions.

As the GV team says, this process for evaluating every solution at once is bizarre, but effective.

"Instead of meandering, your team's conversations will follow a script. The structure is socially awkward, but logical....[If] you feel like Spock from Star Trek, you're doing it right."


GV Design Sprint storyboard

Once you've narrowed the field to a select few solutions, create a storyboard as a plan for the prototype. It's similar to the solution sketch, but with perhaps 10 to 15 scenes.

First, draw a simple grid with around 15 empty boxes on a whiteboard. Now, draw the opening scene, where the customer first encounters the solution. As GV describes:

"If you're prototyping an app, start in the App Store. If you're prototyping a new cereal box, start on a grocery shelf....The trick is to take one or two steps upstream from the beginning of the actual solution you want to test."

In our sample problem, the reader most likely meets the solution somewhere within a blog post. Alternatively, you could start one or two steps upstream, where the reader learns of the blog perhaps from a search result or ad.

After drawing the opening scene, it's time to fill in the details.

"You'll build out your story, one frame at a time, just like a comic book....Whenever possible, use the sticky notes from your winning sketches and stick them onto the whiteboard."

When storyboarding, the story should tell itself. If the user must ask "What happens next?", a frame is missing. Add every step you can imagine, pulling from the ideas you've already voted on.

Eventually, you will come to a gap in the story—perhaps you don't know where a button should lead the reader. That's ok. When we test the solution later on, the goal is to see whether or not the user fills out the form, not to understand where the user is directed after form completion.

Remember, the prototype does not need to be a fully-functional product. Unless the gap is critical to testing the prototype, don't stop. There are two ideas GV uses to keep drawing beyond the gaps:

  1. Don't invent new ideas

  2. Each frame of the storyboard equals one minute during testing

At this point in the design sprint, you have developed, refined, and eliminated a number of ideas. So don't give in to new ideas that might pop into the your head. Trust the process—only push forward with the ideas you've already refined.

And stay succinct. The one-frame-per-minute rule (and a max of 15 frames) will protect you from an endless test the next day. Testing the prototype should take no more than 15 minutes; the rest of the time should be dedicated to feedback, interview questions, and discussion.

When in doubt about where to go next in your storyboard, lean towards risky solutions. GV says:

"Remember that the sprint is great for testing risky solutions that might have a huge payoff. So you'll have to reverse the way you would normally prioritize....Skip those easy wins in favor of big, bold bets."

Day 3 Adjustments

Skip those easy wins in favor of big, bold bets.

Day 3 of a full design sprint is set up for a group, with voting and detailed sketches. But it can still work for a smaller teams or individuala in a mini-design sprint.

Consider giving yourself more leeway to create and vote on multiple solutions, perhaps coupled with day 2's tip to step away from ideas and approach them with a fresh mind. Bring a key stakeholder in to narrow the solution sketches, hear your justifications, and give a supervote. An outside perspective can always be helpful.

Day 3 also requires a lot of space to present multiple solution sketches and storyboards in a visually neutral manner. If you don't have enough space, perhaps use a storyboarding apps. Look at suggestions side-by-side on your computer, or even use your tablet and phone for extra screens to showcase all the ideas at once.

Day 4: Prototype

GV Design Sprint Day 4

It's finally time to build a prototype—a "fake" model of the final solution. As GV says:

"[Day 4] is about illusion. You've got an idea for a great solution. Instead of taking weeks, months, or, heck, even years building that solution, you're going to fake it. In one day, you'll make a prototype that appears real....And on [day 5], your customers—like a movie audience—will forget their surrounding and just react."

"Fake" means more than pretty pictures. GV finds that you can usually build 90% of a solution in a single day. It's mostly a facade—there's "no plumbing, no wiring, no structural engineering. Just a facade."

Try making a demo website—even in a word processor or presentation app, if you need—that showcases your ideas. For our problem, you'll make a fake CTA design and show how it'd fit into the blog post. Once the reader has clicks the CTA, though, the prototype ends—it's just a mockup of what the concept would look like.

The prototype day requires you to shift your thinking from the first three days. Don't think about making everything perfect, just try to make something "good enough" to show off the concept.

The "prototype mindset" includes four principles:

  1. You can prototype anything: Most solutions can be prototyped. GV has run more than 100 sprints, and managed to prototype apps, websites, robots, and medical platforms using the same one-day process.

  2. Prototypes are disposable: While the prototype should be 90% finished, keep in mind that the prototype is disposable. GV says: "...don't prototype anything you aren't willing to throw away. Remember: this solution might not work."

  3. Build just enough to learn, but not more: The purpose of the prototype is to answer questions, not provide a fully functional product.

  4. The prototype must appear real: While a fully functional product is not required, the prototype must appear real—something GV calls Goldilocks quality. The users should not need to use their imaginations during the test to understand the solution. Don't use placeholder text; make everything look real.

The most important thing you'll get from the prototype is each user's reactions. As GV says:

"In [day 5's] test, customer reactions are solid gold, but their feedback is worth pennies on the dollar."

Getting the reader's feedback on how the blog or solution can be improved is not nearly as helpful as seeing an actual reaction. That's why the prototype must provide an actual experience—it needs to look real, so we can see how people react to it.

Building a prototype sounds daunting, so the GV team has four steps to simplify things:

  1. Pick the Right Tools

  2. Divide and Conquer

  3. Stitch it Together

  4. Do a Trial Run


1. Pick the right tools

For your prototype, don't use the tools you'd pick for your final product. You want a hammer, not a bulldozer. GV explains:

"The trouble with your team's regular tools is that they're too perfect—and too slow. Remember: Your prototype isn't a real product, it just needs to appear real. You don't need to worry about supply chains, brand guidelines, or sales training. You don't need to make every pixel perfect."

Keynote
A prototype UI mocked up in Keynote for Mac

Through hundreds of design sprints, GV has found that Keynote (for Mac users) and PowerPoint (for Windows users) are most often the perfect tools to build prototypes. Both are flexible enough to make realistic demos with some functionality—but not too much. That helps you hit the "Goldilocks quality", as GV describes:

"If the quality is too low, people won't believe the prototype is a real product. If the quality is too high, you'll be working all night and you won't finish. You need Goldilocks quality. Not too high, not too low, but just right."

Here are some other great presentation apps that might help you mock up your ideas. Or, if you want a high-fidelity prototype for your product, a form with some integrations can make a convincing proof-of-concept.

2. Divide and Conquer

Next, divide and conquer. In a full design sprint, this entails divvying up parts of the prototype to different team members. (For a mini-design sprint, this most likely means you'll bite off one piece of the prototype build at a time.)

Figure out which tasks fit each person's skills. There's icons, writing, asset, scripts for interviews, and more that are needed—not to mention the actual design process in the app. Give everyone their own spot to work, but make sure you're using the same tool so it's easy to combine the parts into a finished prototype.

3. Stitch it Together

Now it's time to pull the pieces together. Combine the assets from each team member, and add any finishing touches like your company's logo. Check the details—make sure dates, times, and names are consistent throughout the prototype.

There's one more thing to focus on: your interview script. Make sure every part of the prototype is document into a script, one that flows in a logical manner. You can then use it to learn from the users in the testing day tomorrow.

4. Do a Trial Run

Finally, day 4 ends with a trial run. You'll test the product on real users tomorrow; today, find someone else to test drive the prototype for a trial run. A co-worker with some knowledge of the subject is a good option, because they will understand the existing environment and what the proposed solution will add or subtract from it.

This is your chance to make final tweaks to the interview script, along with any minor changes the prototype may need. Again, don't add new ideas or rewrite anything. The main goal of the trial run is to build confidence in the plan, and make sure you're still on track.

Day 4 Adjustments

Don't prototype anything you aren't willing to throw away.

With a full team, you could split up responsibilities to build the prototype. But with a mini-design sprint, you'll need to fill each of these roles individually (i.e. maker, stitcher, writer, asset collector, and interviewer).

Instead of splitting up roles, during a mini-design sprint you should prioritize each of these exercises. For instance, asset collection and making the prototype should be done first. Stitching, writing, and interviewing will serve as the final touches before moving into the trial run.

Day 5: Test

GV Design Sprint Day 5

It's time to see exactly how far you've come, how far you need to go, and identify next steps. On day 5 you'll conduct a series of interviews with users as they try your prototype.

All you need to do is find five people to interview. That may seem too few, but GV has found the data learned after five interviews plateaus quickly, both from their experience and that of user research expert Jakob Nielsen's work:

"Nielsen analyzed eighty-three of his own product studies. He plotted how many problems were discovered after ten interviews, twenty interviews, and so on. The results were both consistent and surprising: 85% of the problems were observed after just five people."

Each interview should be one-on-one, and last one hour. One-on-one interviews answer why certain things work or don't work, as you can directly observe what a user does. And the hour time-limit gives you 15 minutes for the demo, and a generous 45 minutes to talk through your questions with the user.

Interviews don't have to be difficult. There's no magic or specialized background required; rather, all the interviewer needs is a "...friendly demeanor, a sense of curiosity, and a willingness to have your assumptions proven wrong."

GV Design Sprint interview

The GV team divides their test interviews into five acts:

Act one starts with a welcome and small talk, along with asking for permission to record the interview. The non-interviewing team members typically watch the interview in a different room—via a window or camera—and take notes. That way, the interviewer doesn't need to take notes, and can just focus on the user.

Act two consists of open-ended context questions. Don't show the prototype yet. Instead, build rapport with the interviewee and learn what they think about your ideas to help understand their reactions and responses. GV suggests:

"A great series of context questions starts with small talk and transitions into personal questions relevant to the sprint. If you do it right, customers won't realize the interview has started. It will feel just like natural conversation."

Act three introduces the prototype. You should ask the interviewee, "Would you be willing to look at some prototypes?" That helps the interviewee know they are doing you a favor.

Act four has the interviewer give the interviewee specific tasks designed to trigger a reaction as they engage with the prototype. You want the interviewee to figure out the prototype without your assistance—and want to capture their raw reaction to the prototype. Just give them a general instruction, and see what they do.

In our example project, for instance, the interviewer would simply guide a blog reader to an article. The reader should naturally read through the blog post, encounter the CTA, and make a decision whether or not to engage with the CTA.

You may need to "nudge" the interviewee to help uncover their reaction. Perhaps as the user looks at the blog post, you could ask What is this? and What is this for?, What are you looking for next?, What would you do next? and Why?. Dig into what they're thinking, instead of asking for direct feedback.

Act five involves debriefing the interviewee to find their overarching thoughts and impressions. To maintain a neutral position, keep the interviewee talking with responses like "uh-huh" and "mmm", instead of positive statements like "great!" and "good job".


This five-act interview should uncover a wealth of raw material. Now, it is time to learn. As GV explains:

"You know this story, but you don't know how it ends. That's what [day 5] is all about—finding the end to your sprint story. It's a chance to put your prototypes in front of real customers, see how they react, answer your sprint questions, and make a plan for what to do next."

During each interview, the rest of the team should take notes—but you'll need a unique format to help you draw conclusions from the answers. Make a board with 5 columns— one for each interview—with a single row for each question you want answered. Then, write answers, comments, observations, and reactions on sticky notes, and place them in the corresponding spots in each column.

For our test project, those could be:

  • What made the call to action clear or unclear?

  • Why did you decide to engage, or not engage, with the call to action?

  • What could the blog post have included to better entice the reader to engage with the call to action?

Once the interviews are finished, you'll start seeing patterns on your board. Compare the patterns to the sprint questions and determine whether or not the questions are answered.

Most often, the next steps you should take will make themselves clear. Each sprint will uncover its own results, and you'll quickly know whether to turn this prototype into a product, or start over. Regardless, GV suggests:

"Maybe the best part about a sprint is that you can't lose. If you test your prototype with customers, you'll win the best prize of all—the chance to learn, in just five days, whether you're on the right track with your ideas. The results don't follow a neat template. You can have efficient failures that are good news, flawed successes that need more work, and many other outcomes."

Day 5 Adjustments

Put your prototypes in front of real customers, see how they react, answer your sprint questions, and make a plan for what to do next.

With a full team, interviewing and writing notes separately is easy. You'll have to adjust for your mini-design sprint. You still need to interview, and you can't have your head buried in notes the whole time.

Instead, get permission and then record a video of each interview so you can watch the interviewee's reactions. You can later go back, watch the video, and then make detailed notes.

This stage will take far more time as an individual or small team, but you'll still get the same actionable feedback—and will know if the project is worth your time after all.

Sprint Your Next Projects

Design sprints help teams at big-name companies like Google, YouTube, Nest, Blue Bottle Coffee, and Foundation Medicine address massive problems in just a week. With a few tweaks, they can be equally useful for smaller teams and individuals, too.

The timeframe and problems can change. Your constant is the design sprint's effect. As the GV team says:

"...when teams follow the process, it's transformative. We hope you've got the itch to go run your own first sprint—at work, in a volunteer organization, at school, or even to try a change in your personal life."

It just might be the process that sparks your next moonshot project.

Design Sprint Resources

Ready to start your own Design Sprint? Here are some resources from the GV team to help you get started:

  • Learn more about each day in the design sprint with Sprint Week, a set of articles on Medium from GV about each day in the sprint process.

  • Buy a copy of The Sprint Book for a more in-depth look at design sprints, and the ideas that inspired them.

  • Use the free Sprint Monday Morning Presentation to start your sprint off right.

  • Grab a presentation app to prototype and share ideas.

  • Download a free Sprint Checklist to keep your team on track throughout the process.

Curious about how the Zapier team works? Check out Zapier's Guide to Remote Working for a detailed look at how our team works together from around the world, then dive into our Project Management 101 Guide to find solutions to keep your projects on track once the design sprint is finished.

Images via the GV Sprint Monday Morning Slide Deck.

Get productivity tips delivered straight to your inbox

We’ll email you 1-3 times per week—and never share your information.

tags

Related articles

Improve your productivity automatically. Use Zapier to get your apps working together.

Sign up
See how Zapier works
A Zap with the trigger 'When I get a new lead from Facebook,' and the action 'Notify my team in Slack'